Staircase Delivery and production time for our floating wooden staircases ranges from 8-10 weeks depending on the complexity of the staircase and the number of staircases being currently being produced. It should be noted that this timescale be based on from drawing approval not from when the actual order has been placed.
The factory does shut down twice a year (July and December) which will affect the delivery timescales so please plan ahead and speak to us about your requirements. With all items on a longer lead-in time it is worth planning ahead and ordering plenty of time in advance.
Your new staircase will be delivered in flat pack form, boxed and with the drawings included. It is a kerbside delivery service and people will be required to help off load. The transport firm will call you several days before delivery to advise on a suitable day and an AM or PM. If the staircase has been supplied RAW it must be fitted straight away to avoid any movement in the timber.
It is worth noting that neither the transport firm, the factory or us have storage facilities so the staircase needs to be delivered once produced. This of course is all about communication and planning so if, during production your requirement for the stair has been unexpectedly delayed – please let us know as soon as possible.
Installation
All our floating timber staircase are priced supply only for installation by others. We are a retail establishment and not a contractor. All the models you see on the website have been installed by the contractor on site. They are very straight forward to install and arrive with full instructions.
The staircase arrives in component form which each element numbered. To the right is a speeded up video of a quarter turn Walnut floating staircase being installed.
N.B. The Stability of the Floating timber staircase is based on a secure fixing of the newel posts to handrail , the wall stringer to wall and the top of staircase to edge of floor. It is also very important to allow for plenty of silicon to be applied between timber joins especially in grove between tread and stringer. This is primarily to allow for a little movement and prevent squeaking.
STEP ONE
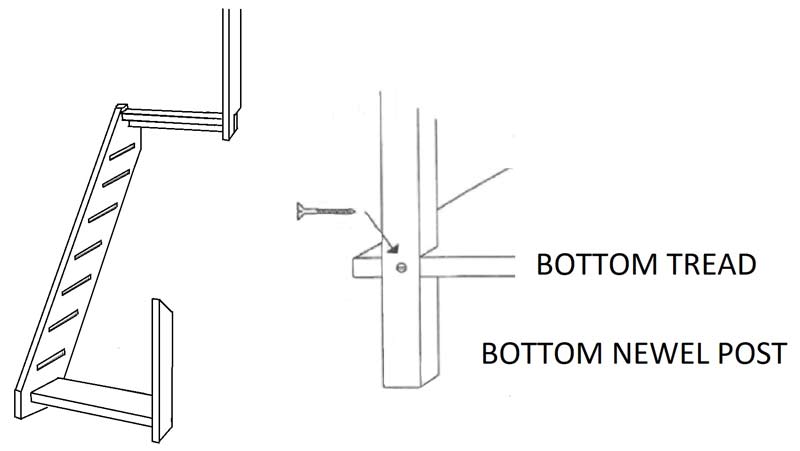
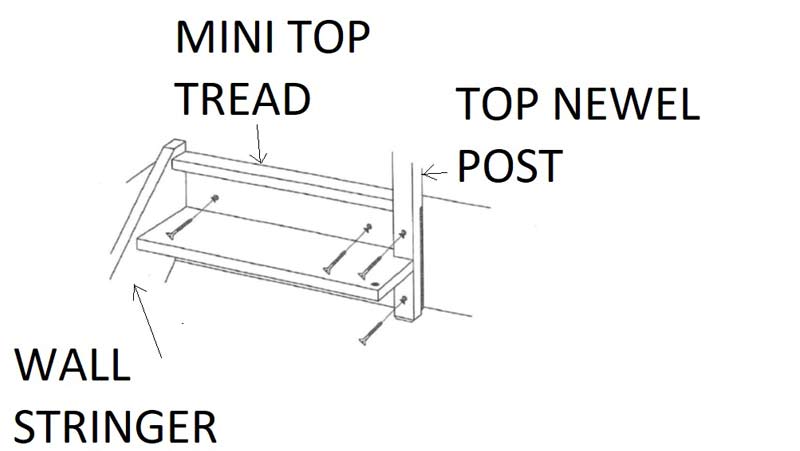
-Connect the stringer to top and bottom step and newel posts.
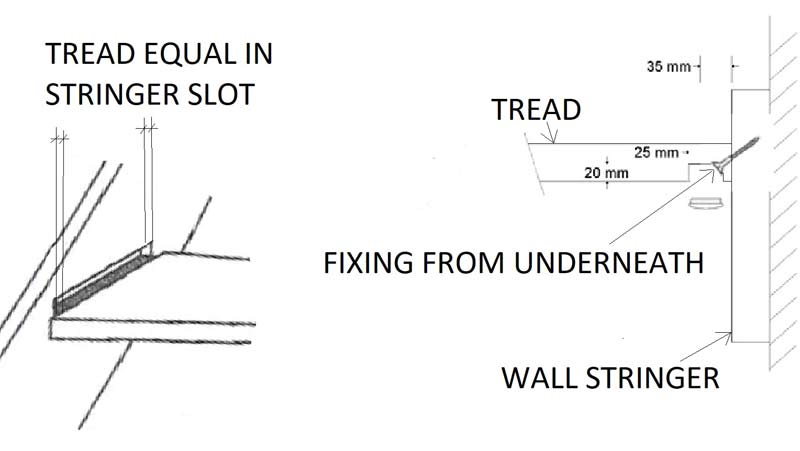
-Offer up to wall, check levels and drill through stringer into wall for fixings (within stringer tread grove will hide the fixings once treads are in place)
-If using a resin fixing, pull the stair away and prepare the hole in the wall
STEP TWO
-Bolt the stringer into the wall
-Fix the upper apron plate and newel to the floor
-Fix the handrail to both the newel posts.
STEP THREE
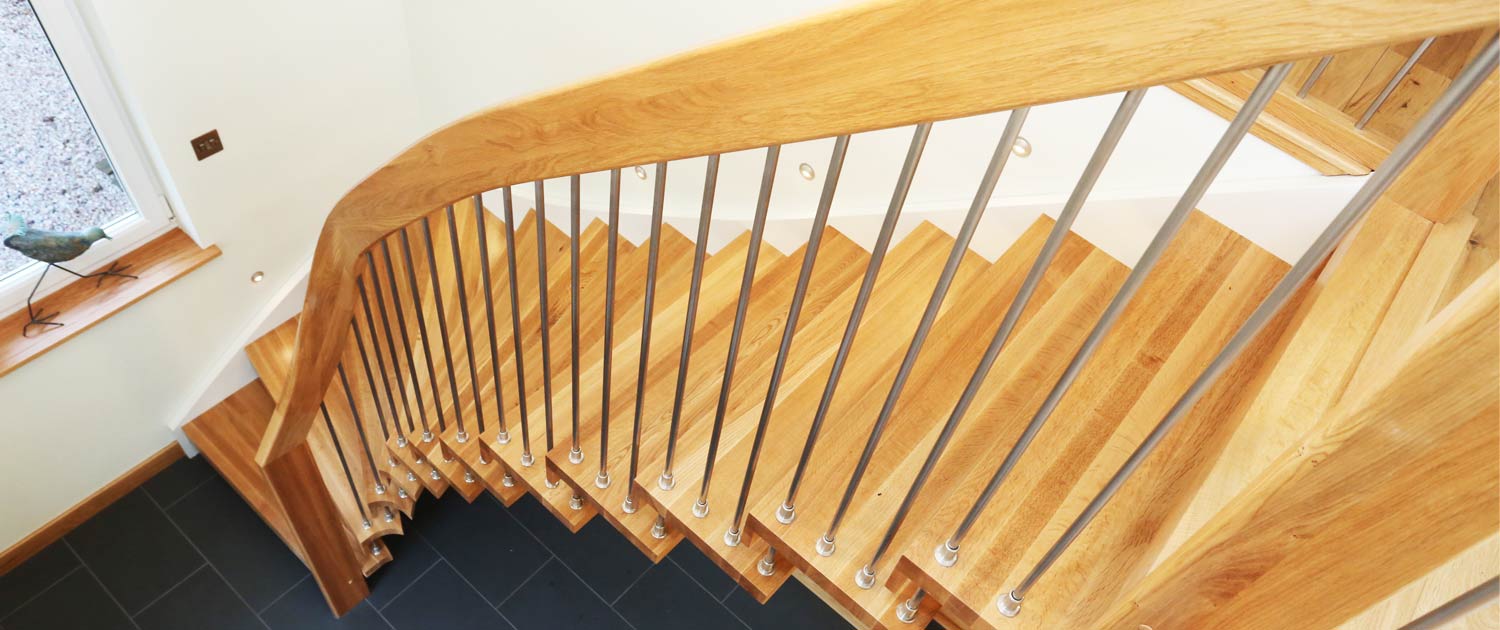
-Wind all the spindle into position into the handrail. These will be numbered and will be different lengths.
-Slot, centre and fix the treads into the wall stringer from the top down. These are screwed from under the tread. The top and second bottom tread will also fix to the newel post.
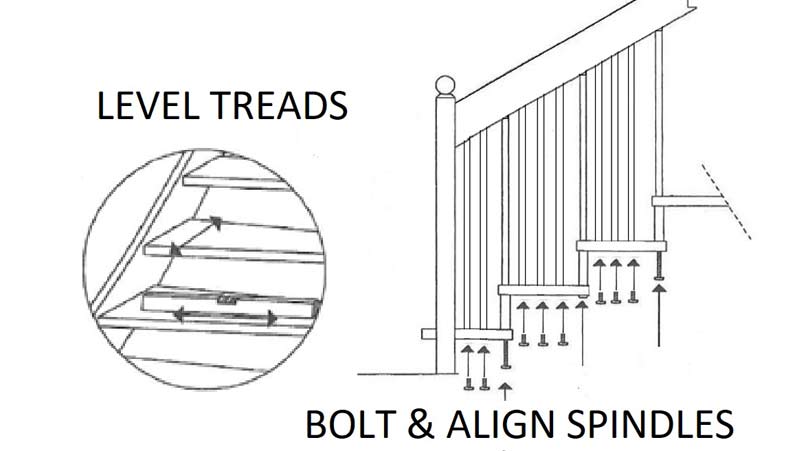
-Whilst fixing the treads connect 1 or 2 of the spindles to the outer part of the hanging treads using the bolts supplied. This is just temporary to take to load.
STEP FOUR
-Working with one at a time bolt the spindles to the treads.
-Use the smaller bolt to fix the middle tread spindles in place and the longer bolt to fit the spindles that span from one tread to the next.
-With a spirit level, check the level (both ways) of each tread and align the spindles and the adjustable foot.
Staircase Projects
View our extensive range of completed projects with pictures and description of the wooden staircase along with the location.
Staircase Gallery
Have a look at our inspirational gallery to see our floating timber staircase in all manner of settings.
